- Published 11 Jan 2023
- Last Modified 4 Sept 2023
- 6 min
Types of Clamps: The Complete Guide
In our comprehensive guide, we look at the different types of clamps that are available on the market, what the difference is between them, and what you can use them for.

What are clamps?
Clamps are hand tools designed to bind or press two or more objects together to keep them firmly in place. This is useful when holding or glueing materials together, for example, wood, paper, plastic, or certain metals.
They generally feature a movable jaw affixed to an adjustable screw, while some designs have two screws. Most types are designed to be used temporarily, however, there are permanent models available. The below diagram shows some of the different parts:

Different types and their uses
The table below outlines some of the most common types and which applications they’re best suited for.
G/C Clamps
- It gets its name from its shape, which looks like a capital G – however, it’s also sometimes referred to as a C clamp.
- It’s one of the most widely used and versatile styles. It can be used to clamp an object to a work surface or two separate objects together.
- Different styles also have throats with varying depths, which is the distance from the screw to the inside edge of the frame. This size of this type generally ranges from 3″ to 14″.
- Miniature versions are also available, which start from 1" x 1". Mini clamps are ideal for modellers and hobbyists.
Spring Clamps
- Also called a pinch clamp, this tool has two grippers, two handles and a spring pivot which connects the parts together in the middle.
- This type provides light clamping pressure, with force only to be applied to the handles when the mouth needs to be opened.
- The jaws usually include soft plastic or rubber pads to protect the object or material being clamped.
- They’re commonly used in woodworking and carpentry to hold awkward or delicate objects, as larger clamps would be unsuitable. It’s also a good choice for a range of domestic tasks around the home.
F Clamps
- The name F clamp comes from its F-shaped design. It features a long vertical bar and two smaller perpendicular jaws.
- Its sturdy construction means this tool is ideal for heavy-duty woodworking.
- This style is available in a range of different sizes.
Sash Clamps
- This tool has a flat bar with a fixed jaw, which can be adjusted with a screw action. It also has a sliding gripper which is locked in position along the bar.
- This style is mainly used for jobs involving larger objects, such as windows, doors or furniture, and several are usually needed at one time.
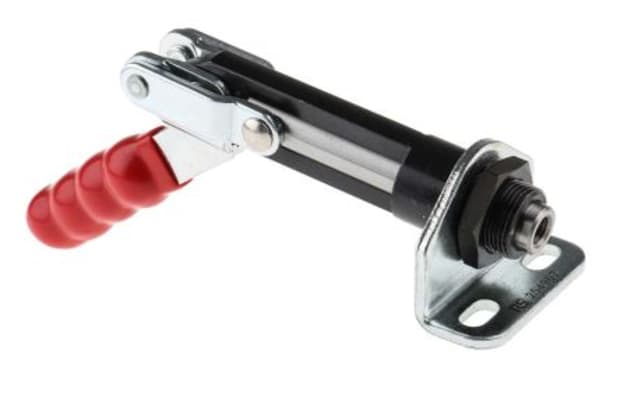
Toggle Clamps
- Toggle clamps have one clamping plate and work in conjunction with a work surface, such as a workbench.
- Unlike other models, toggle clamps are designed to be bolted into place and fixed permanently to the work surface.
- It can also be adjusted to accommodate for objects of various sizes.
Right Angle/Corner Clamps
- This style enables faster and easier working on projects with 90-degree joints. This is because it holds the parts in place while the user can work on the object or workpiece.
- One of the tool’s arms features a steel pin which fits into a pocket hole, allowing for two objects/surfaces to be clamped together.
Pipe Clamps
- These are very similar to the sash design, however, use a round shaft instead of a flat bar.
- This allows it to reach any opening capacity, provided the right sized pipe is available.
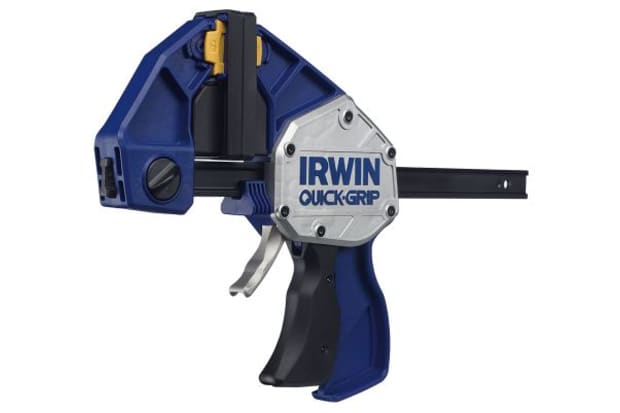
Quick Action/Quick Release Clamps
- These are also known as one-handed clamps. The lever is designed to allow the user to release an object in one quick movement.
- There are different styles available, such as lever, spring and trigger.
Band Clamps
- These are also known as strap or web clamps and feature a strong nylon strap, instead of the more rigid metal grippers found in other types.
- This makes it ideal for gripping large or irregular-shaped objects.
How to use clamps
For safety reasons, it’s important to ensure the correct clamp is being used for the task. Here’s a step-by-step guide on how to use the tool:
Step 1
Use a piece of scrap wood between the mouth of the clamp and the object, to prevent damage or marking.
Step 2
Open the mouth using the screw/lever, until it can accommodate the object being worked on.
Step 3
Turn the screw or release the handle to close the mouth around the object to firmly hold it in place.
Step 4
Take care that fingers and skin aren’t pinched by the frame or screws.
Step 5
Don’t overtighten the clamp – if the fit is accurate, only moderate pressure is needed. The tool is designed to maintain a constant pressure between the two surfaces, and not to apply too much force.
What are clamps used for?
As there are many different types available, this tool is used across a wide variety of industries and applications, as well as among hobbyists.
Here are some of the most common uses:
Woodwork and carpentry
Often they’re used on workbenches to keep wood in place while carrying out tasks such as sawing or chiselling.
Metalwork
For tasks such as welding or grinding, these tools are perfect for holding the metal in place and can be used on a variety of different types including steel, copper, iron and aluminium.
Glueing
They’re ideal for locking objects in place while the glue is setting.
Drilling
They can be used to hold items in place on a drill table.
Painting
Ideal for holding objects in place during painting and decorating.
Top Tips
BEFORE USE
make sure the swivel at the end of the tool’s screw spins freely.
AVOID
using wrenches, pipes, hammers, or pliers to tighten clamps.
DON'T
use the tool if it has a bent frame or spindle.
DON'T
use extra-large styles if you just need a larger throat, as deep-throat versions are available.
Popular clamp brands
As well as a wide selection of clamps, there’s also a range of accessories and alternative products to choose from, including clamp sets. Or browse the top brands:


