- Published 30 Jan 2023
- Last Modified 29 Aug 2023
- 13 min
A Complete Guide to Grease Guns
We’ve created a handy guide to advise you how to use a grease gun and help you pick the right product for your task

In this complete guide, we’ll learn a little more about each of the main types of grease guns and grease nipples. We’ll also find out how the nipple fittings work and explore which other grease gun accessories and kits are available. Finally, we’ll take a brief look at how and when to use grease guns in an array of everyday lubricating and maintenance tasks.
What are Grease Guns?
Grease guns are handy tools used for applying lubricants and greases to various mechanical or moving parts. They are widely used by mechanics, engineers, and hobbyists alike. Grease guns are designed to deliver lubrication under pressure, forcing it into areas of a rotary bearing which may otherwise be very tricky to reach without disassembly.
Where Would You Use a Grease Gun?
Using a grease gun to lubricate a joint or bearing enables better precision, pressure and flow control in applying the grease, delivering it to areas that would otherwise be difficult to access. By far their most common use is on non-sealed bearings, which require regular top-ups of lubricating grease.
Grease guns are very often found in a wide variety of both industrial and DIY settings, with common examples including:
- Auto maintenance
- Agricultural vehicles and equipment
- Factory, plant and processing systems (e.g. conveyors and other goods-handling machinery)
- Gardening and landscaping (particularly for maintenance of lawnmowers and chainsaws)
What are Grease Nipples?
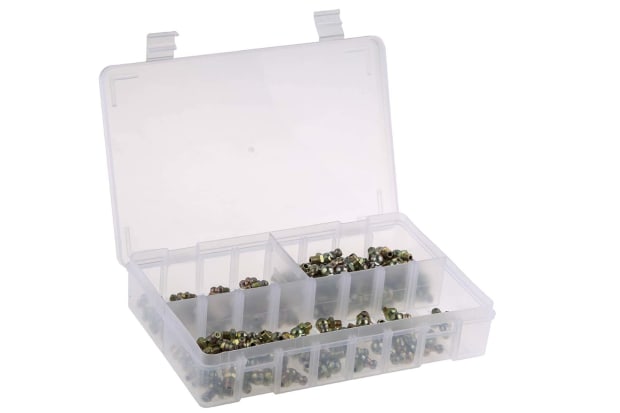
Typically, the use of a grease gun will allow lubricant to be dispensed directly to where it’s needed via a grease fitting, known as a grease nipple. A grease nipple is a type of screw-on metal valve cap featuring a small aperture in the top, with a slim channel behind the opening. This channel runs directly to the area where the lubricating grease is needed, usually in the voids of a bearing.
Using grease guns and grease nipples in combination ensures that lubrication of hard-to-reach areas is a quick, easy and neat process, with minimal clean-up required afterwards.
What are the Different Types of Grease Guns?
Both large and small grease guns are sold in various formats and configurations, such as:
- Lever grease guns - Also called manual grease guns, this type is operated via a simple pressure trigger mechanism, enabling the user to control force and flow rate through their own physical squeezing force
- Hand pump grease guns - This type features a pressurised pump handle or piston as part of the tool, which is primed before use to create a build-up of pressure, and subsequently released via a trigger mechanism to force the lubricant through the fitting
- Pneumatic grease guns - Air-powered models that attach to a compressor via a length of hose, offering greater power for industrial or larger commercial applications
- Battery-powered grease guns - The core mechanism of battery-powered grease guns is similar to the above models, except that the on-board batteries provide the power to create the required pressure build-up (rather than the user having to do so manually or via external means)
The above provides a good overview of the different types of grease guns at a glance, but now let’s explore some of the main types available in a little more detail.
Pneumatic Grease Guns
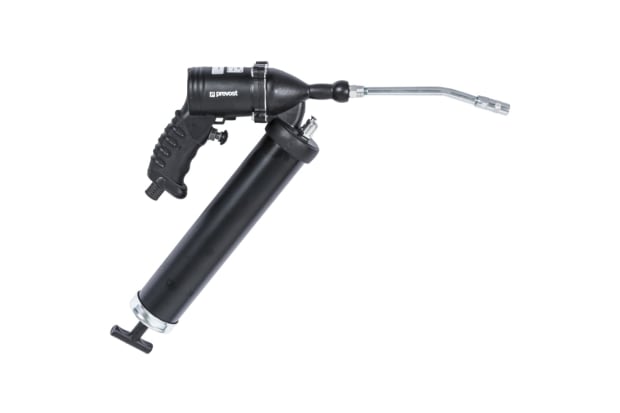
A pneumatic grease gun - sometimes called a pneumatic grease pump or air pressure grease gun - is one of several different technologies available for applying lubricant to bearings and other mechanisms quickly and easily.
What makes air-powered grease guns unique is that the pressure required to force lubricant into a bearing void is provided by an external air compressor. Because mechanised air pressure is fed to the tool in this way rather than being reliant on manual effort from the user, pneumatic grease guns are sometimes referred to as ‘automatic’ models.
When using one of these pneumatic grease guns or pumps, the compressor delivers bursts of highly pressurised air via a length of hose or an air line attached to the handle or body of the tool. In turn, this forces grease through the outlet nozzle of the tool and into the opening of a grease nipple or bearing void.
The air pressure achievable by a compressor is typically higher than what can be generated using a manual or hand pump type tool. Therefore, grease application tends to be quicker and easier. The user will need to be suitably experienced and careful when using air-powered tools, as pneumatic devices of any sort carry an inherently higher risk of potential component damage or injury if operated incorrectly.
Manual Grease Guns
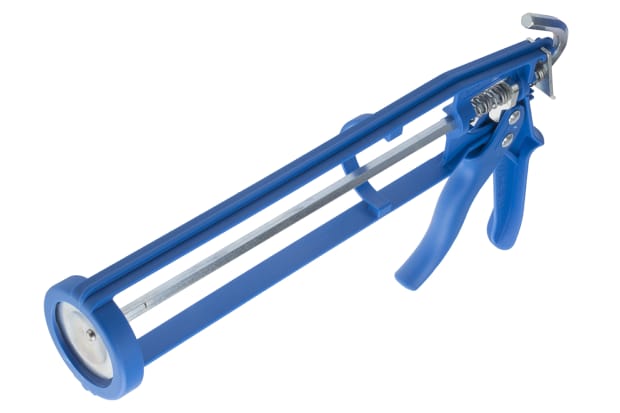
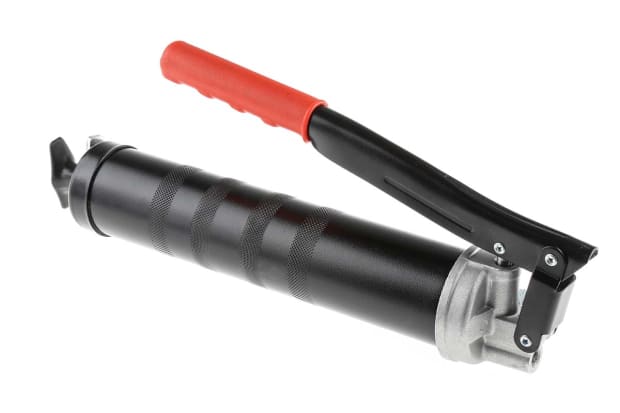
Manual grease gun operation is somewhat simpler than is the case with pneumatic grease guns. This is largely because the user doesn’t have to connect the tool up to any external devices (such as a compressor) in order to get it working. Instead, the manual grease gun - often called a lever grease gun - relies on the operator squeezing a handle or piston to control the flow of lubricant through the nozzle of the tool.
The force applied by the user through the handle is what dictates the speed and level of pressure the grease is pumped to the bearing under. The maximum achievable pressure will be limited by the amount of squeezing force the user is able to exert on the piston or lever of the manual grease gun.
Hand Pump Grease Guns
A hand pump grease gun is very similar to a manual grease gun in terms of how it operates, with one key difference. Instead of a physical input on the lever or piston of the tool translating directly into a flow of lubricant through the nozzle, hand pump grease guns feature an additional trigger mechanism to ‘unlock’ the grease flow once sufficient pressure has built up via a manual pumping action. For this reason, hand pump models are often marketed as pistol type or pistol grip grease guns.
With a hand pump grease gun, the user works the piston lever of the tool in order to create pressure (much like with a traditional hand pump). A separate grease gun trigger is then pulled to release this pressure as a flow of lubricant when it has reached the desired level. This means that greater force can be built up and exerted than would be possible via the squeezing strength of most people’s hands alone. In this way, hand pump grease guns can be seen as something of a compromise between entirely manual and fully automatic models.
Buying Professional Grease Guns
If you’re considering buying a professional grease gun, then the chances are that you will already know at least a basic level of information about how they work and why they’re so handy. After all, these tools are already widely used in all manner of machinery and equipment maintenance and repair jobs, especially in auto shops. That’s why you’ll often see them referred to as ‘car grease guns’, ‘motorcycle grease guns’ or other similar terminology.
However, due to the diverse range of options and configurations available, it may be helpful to look at the exact working differences between the various models on offer in slightly more detail. This should help you to decide which is the best grease gun type for the sorts of jobs where you will be using it. Numerous grease gun accessories, kits and add-ons will also help you to tackle a broader range of tasks with a single tool.
How Do Grease Guns Work?
In aiming to better understand how a grease gun works, people may wonder why it’s called a grease gun in the first place. The simple answer is that the tool’s shape and basic mechanisms give rise to the name.
As well as having a grip and a nozzle or ‘barrel’ of sorts, grease guns are typically operated via a lever that may somewhat resemble a large ‘trigger’. In certain newer or more automated models, this lever may be significantly smaller than in more traditional manually operated formats, giving rise to terms like ‘pistol style’ grease pumps.
The standard features of any grease gun tool - triggers, hoses and so on - tend to be fairly consistent across the full range of options for different formats and models. In other words, nearly all the different types of grease guns look fairly similar, regardless of whether they’re entirely manual, air-fed, battery-powered, or operated with a hand pump mechanism.
You can see the various different components of a grease gun labelled on the diagram below.
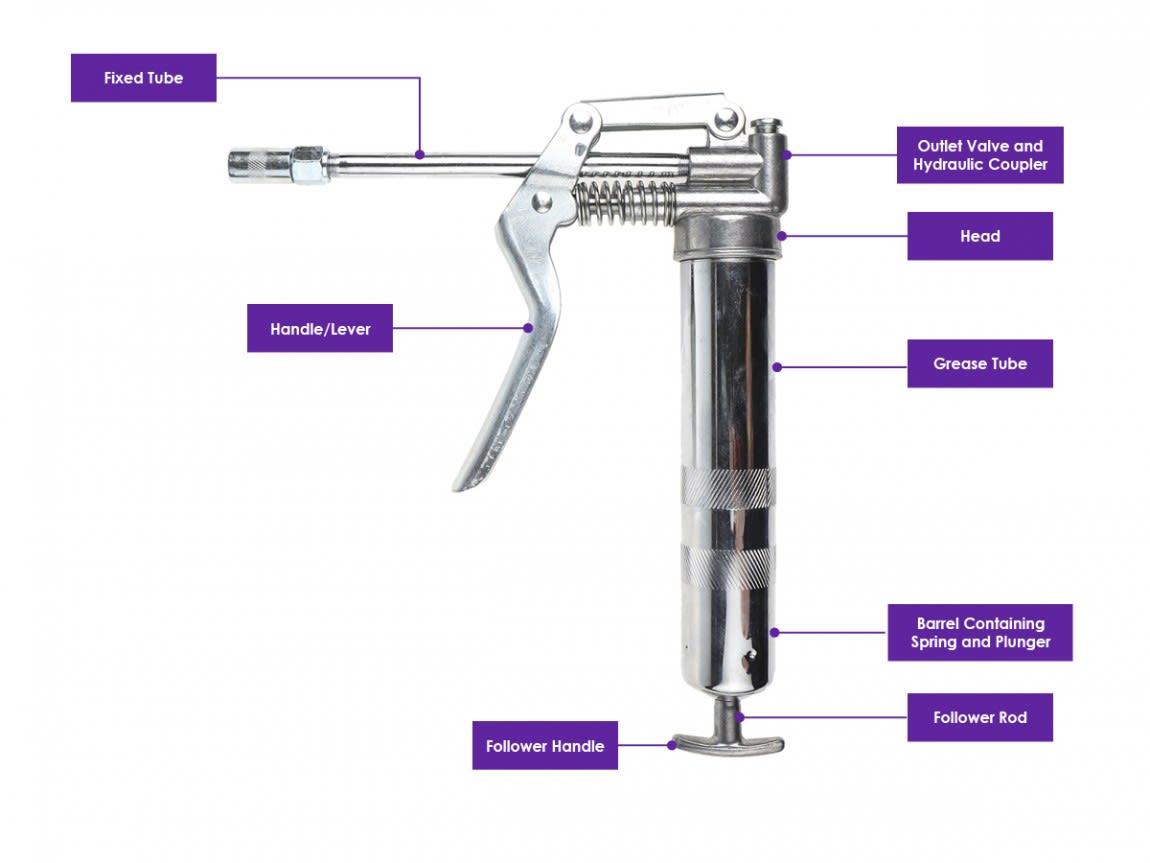
In the following sections of this guide, we’ll examine some of the key differences between each of the main varieties of grease guns and pumps. The key point to bear in mind is that different types of tool will allow for varying maximum flow pressures to be achieved. In turn, this will usually dictate which is the best choice of grease gun for specific applications.
All About Grease Nipples
Nearly all lubricant applications via a grease gun involve a small device called a grease nipple or grease fitting, located on the body of the vehicle or equipment being lubricated. A grease nipple is a small metal fixture that functions as a valve cap, sitting over a grease hole on the exterior of a rotary bearing or similar moving part.
These grease fittings are designed in such a way that the nozzle of a grease gun will fit snugly over the nipple. When lubricant is forced through the grease gun under pressure, a sprung ball bearing blocking an aperture in the grease nipple is depressed, allowing the grease to flow through the hole in the fitting. This hole feeds directly into a channel, which in turn goes straight to the part that requires lubrication.
Grease fittings can either be threaded into the grease hole on the exterior of the part being lubricated or less commonly held in place through friction via a tap-in method. The fact that the ball bearing blocking the aperture of a grease nipple is spring-loaded means that it functions as a basic check valve and will return to a closed position once the flow of pressurised lubricating grease stops. In turn, this prevents dirt, moisture and other unwanted impurities from entering the main rotary bearing and potentially interfering with its smooth operation.
There are several common formats for grease fittings, with the most common being a standard-sized convex shape that fits snugly against the typical concave end of a grease gun nozzle. This combination allows the grease gun to be attached easily from various angles and still make an air-tight connection, meaning fewer instances of lubricant oozing out around the outsides of the grease nipple rather than being forced into the voids as intended.
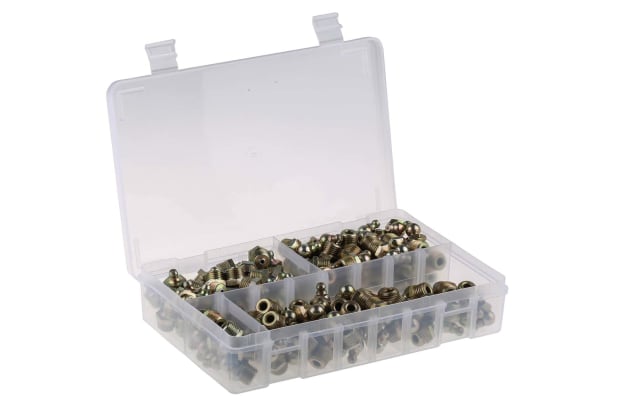
Kits featuring a variety of grease nipple sizes and grease gun fittings are widely available too. These are a sensible option for professional mechanics in auto workshops, for example, where there’s an increased chance of encountering a nonstandard grease fitting in day-to-day maintenance.
How to Use a Grease Gun
Whether you’re using a fully pneumatic or an entirely manual grease gun, you’ll need to fill it with grease or lubricant before using it. This is a relatively simple process, but one that can certainly benefit from some practice and experience in order to speed up the process and achieve the smoothest possible operation of the tool.
As noted above, lubricants designed for use with grease guns are normally sold in cartridges. These tend to slot directly into a tight-fitting tube or cylinder on the body or handle of the grease gun itself. A plunger mechanism below the cartridge is often used to help release the old cartridge and fix the new one in place, priming it for use.
It’s important to make sure you’re aware that there are many different types of lubricants and greases for grease guns, as well as various different grease gun cartridge sizes available. You’ll need to know what sorts of greases are suitable for the job you’re looking to perform before starting. You can find out more about the different types in our complete guide to greases.
Regardless of the grease gun cartridge size, the process of how to replace a cartridge will typically involve the following key steps:
- Unscrew the cylinder from the body of the grease gun and remove the old grease cartridge
- Open a new lubricant cartridge and insert it into the tube. It’s recommended to always check individual manufacturer guidelines for doing this, but commonly it will involve opening the tube from one end, inserting this end down in the cylinder, then opening the other end
- Screw the refilled tube back onto the body of the grease gun until tight, then back it off one full turn
- Push the plunger back in and re-tighten the threaded cylinder onto the body of the grease gun
- If you’re using a different grease than before, you’ll need to pump a small quantity of the new lubricant out through the nozzle of the grease gun until none of the old grease is left inside
Once your grease gun has been fitted with a new lubricator cartridge, the precise method for using it will, of course, depend largely on which type of tool you have. In the case of most manual grease guns, it will be a simple process of attaching the nozzle or tip to a grease fitting on the bearing you want to lubricate and applying steady pressure until you’ve dispensed the appropriate amount of grease into the bearing. For pneumatic grease guns, you will need to get them set up correctly with an appropriate compressor or generator first.
Tips for Best Practice
Some additional best practice tips for using grease guns effectively include the following:
- Always wear protective safety glasses and gloves when using grease guns, as the lubricant will be highly pressurised
- Don’t mix old and new greases - use only the correct type of lubricant for the job and parts you’re working with
- Check that the grease gun you’re using is approved to work with the type of lubricant you’ve chosen (if you own multiple grease guns for different lubricants or applications, it can be helpful to mark them clearly)
- Be extremely careful when loading up a new grease cartridge that you don’t introduce any contaminants which could damage the bearing. In particular, always ensure that the nozzle is clean and clear of old material before applying any new grease
- Similarly, make sure grease nipples and fittings are clean before attaching the grease gun nozzle
- Make sure all threading, couplers and connections are closed tightly but don’t over-tighten as this can cause failures in pressure and flow
- Always clean up any spillages immediately as grease left around on surfaces and floors can be a hazard
- Store grease guns and cartridges upright in a cool and dry environment. Ideally, you should also cover up nozzles and couplers to minimise the risk of accidental contamination
Popular Products
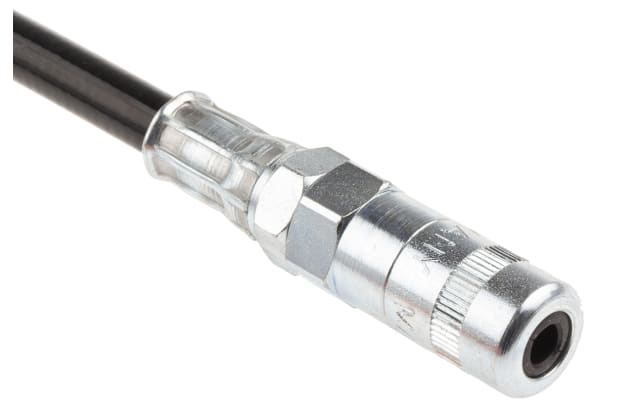
Grease Gun Hoses
Flexible grease gun hoses are ideal for reaching confined areas. Browse the range online with RS.
Manual Grease Guns
Explore our selection of manual grease guns including products from brands such as SKF and THK as well as RS Pro, our own in-house brand.
Grease Nipple Kits
Browse our range of grease gun nipple kits and discover the most suitable product to suit your needs.
Pneumatic Guns
Effective and efficient, pneumatic grease guns offer a wide variety of benefits. Shop our full range online.
Related links
- Manual Grease Guns
- RS PRO Grease Nipple Kit Contains H1 Straight 6x1 mm (x50); H2-45...
- Grease Gun Nipple Kits
- The Complete Guide to Greases
- RS PRO Grease Nipple Kit Contains H1 Straight 1/4 in BSF (x50);...
- RS PRO Grease Nipple Kit Contains H1 Straight 1/4 in UNF (x50);...
- Steel Manual Grease Gun
- Manual Grease Gun
